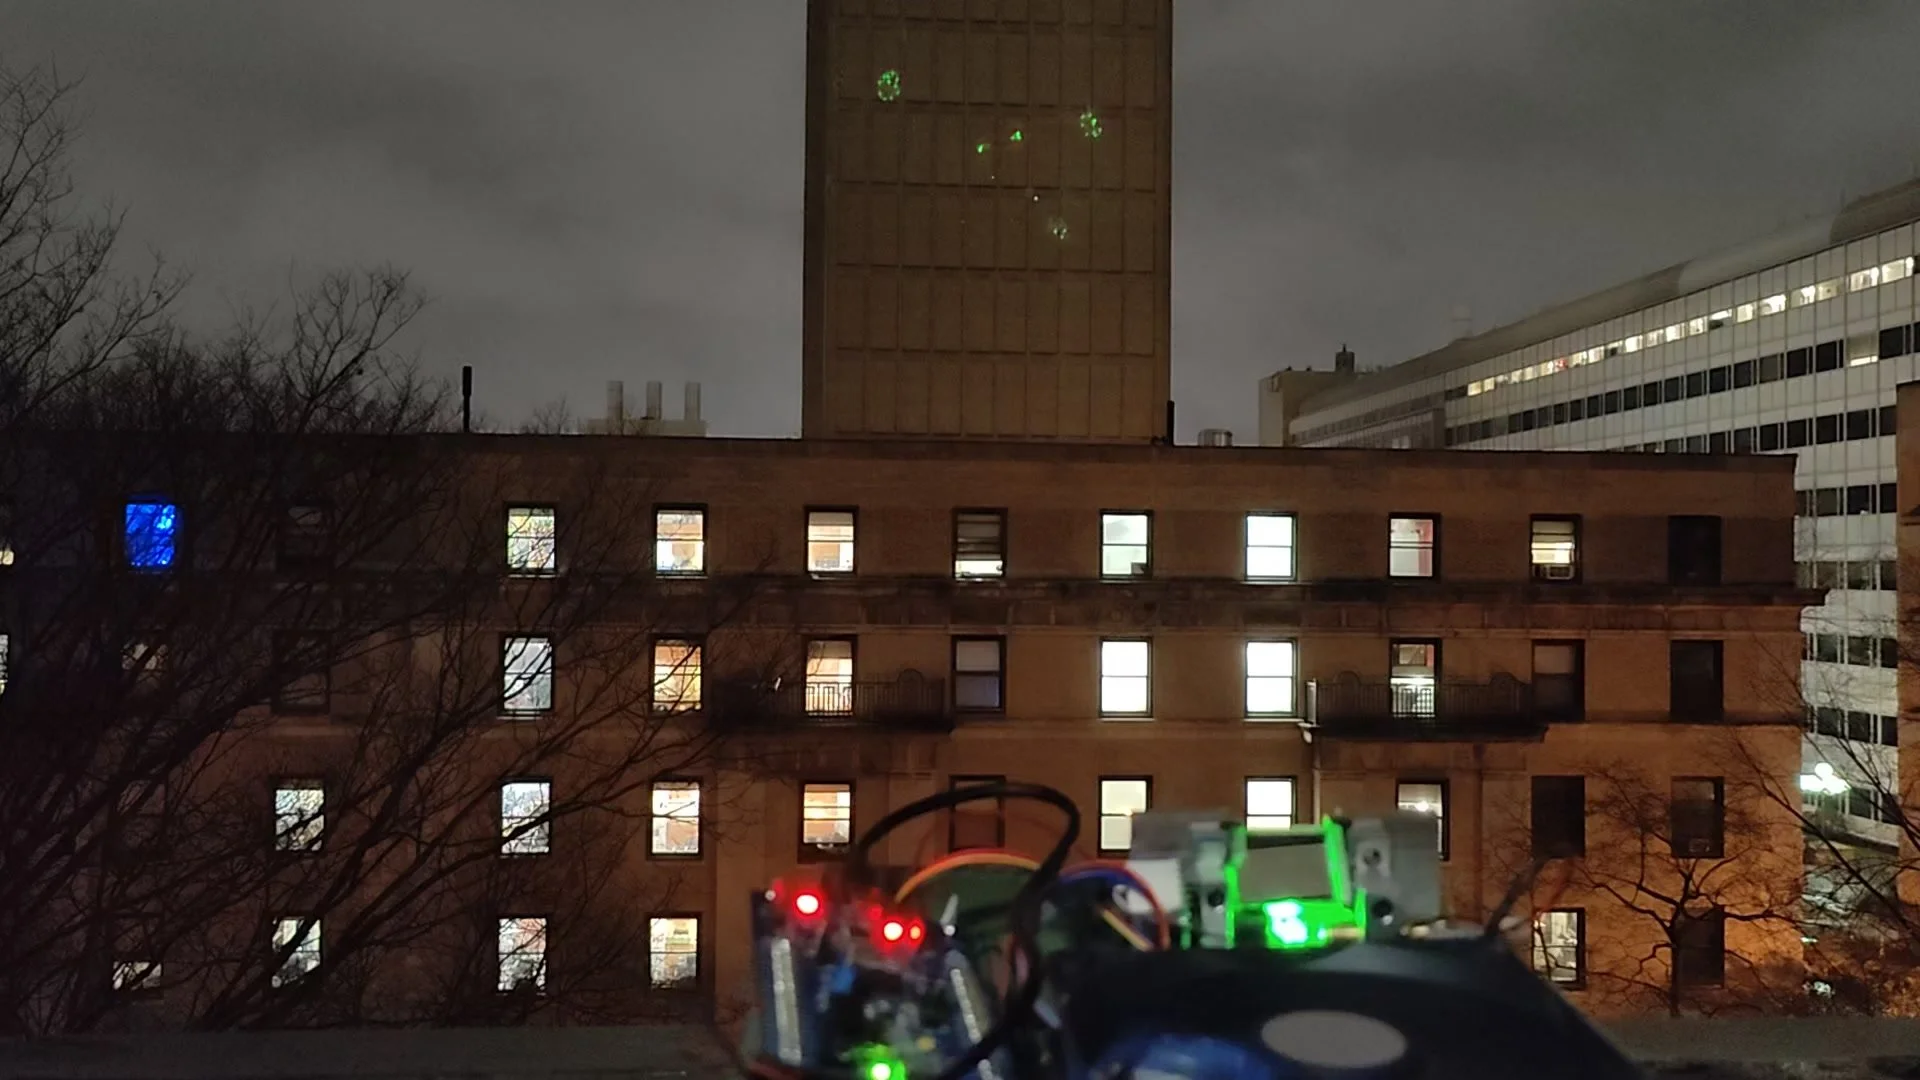
Asteroids On the green building:
This was a quick project I put together in a week for Bad Ideas Weekend, a tradition run by my dorm at MIT. It gives students funding to realize crazy ideas like making 2048 dumplings in one sitting, or in my case, projecting the retro atari game ASTEROIDS on the side of the tallest building on campus. This building houses our Earth and Planetary Sciences Department, so I thought It would only be fitting for people to play a game flying through space dodging asteroids on the side.
The inspiration for this project was the parts of an old Formlabs Form 1+ that I found in the trash. These 3D printers use a laser to selectively cure a vat of liquid resin to build up a part, meaning they all have a system that can steer the beam from a laser pointer very quickly. This is known as a “galvanometer” and essentially consists of two mirrors that can be turned very quickly with specialized electric motors and driver boards. I realized I could use this to build a laser projector.
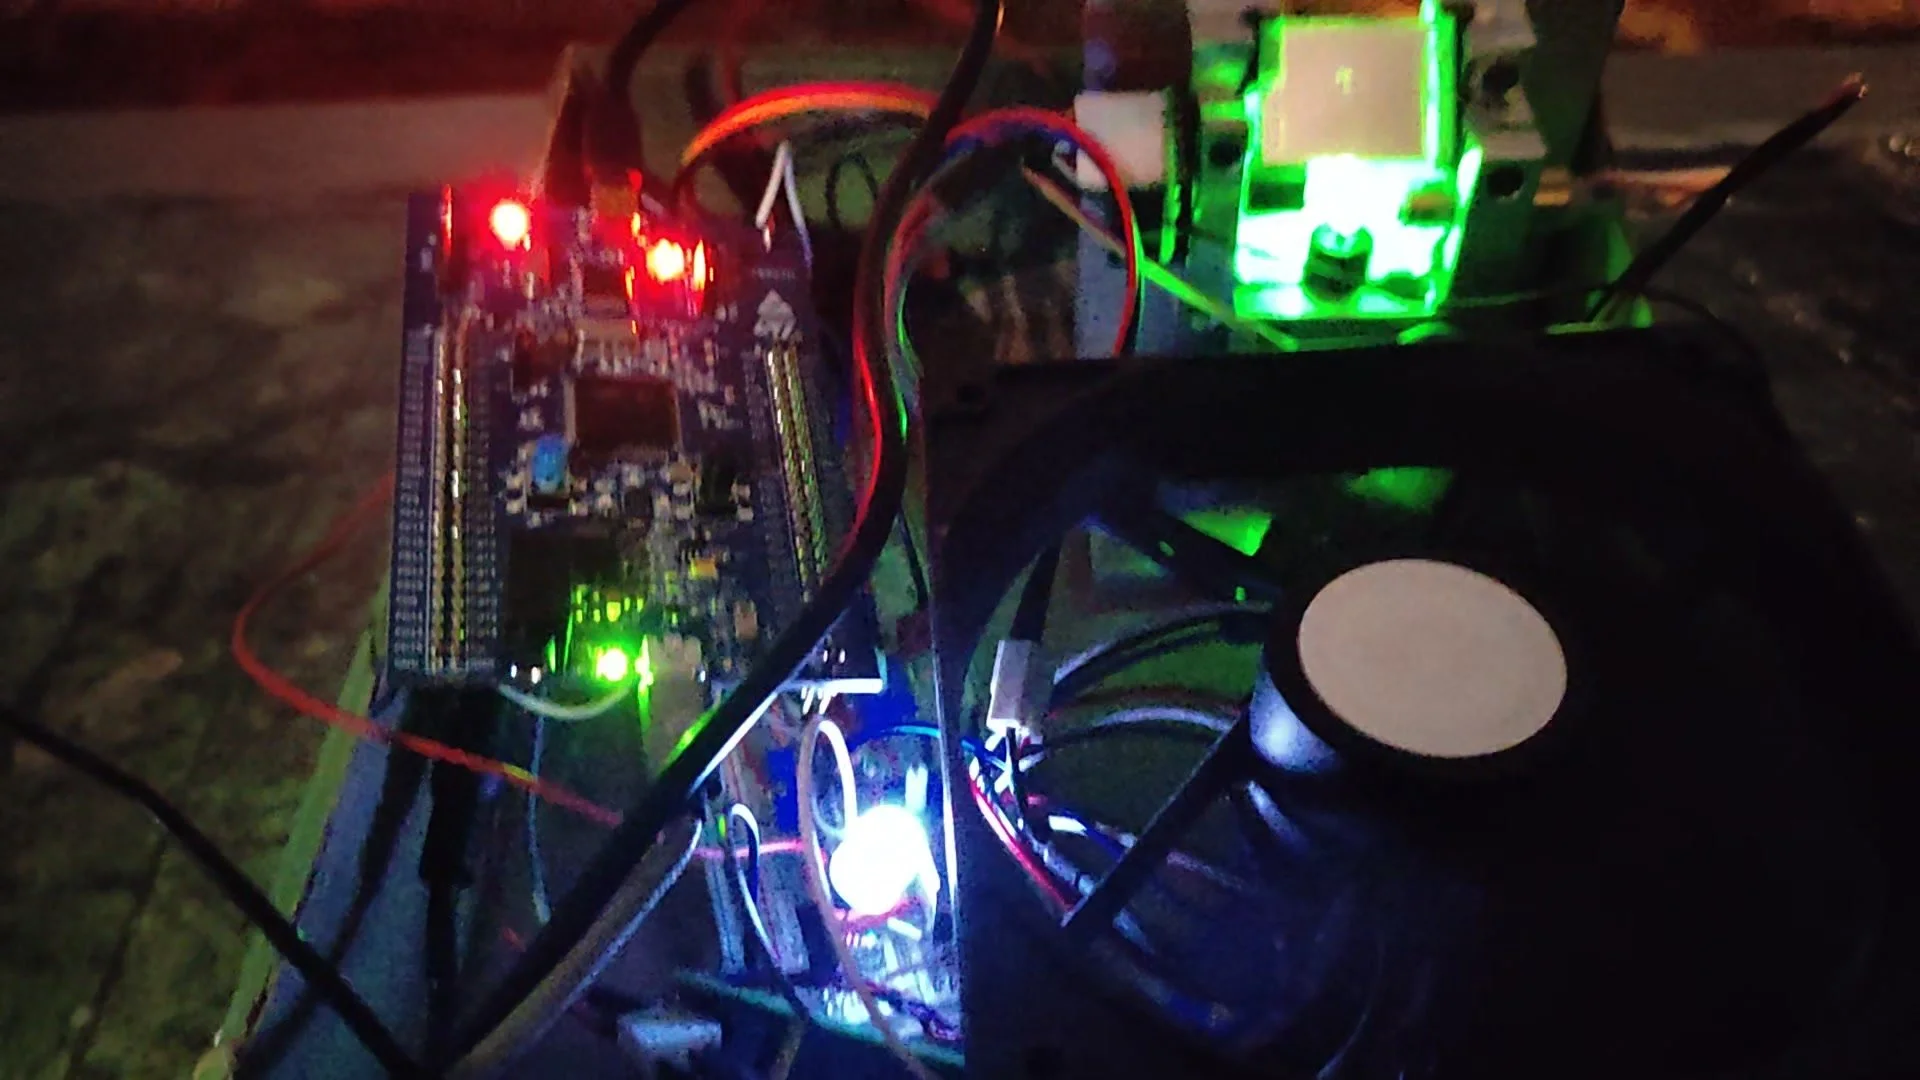
I started by building a circuit to generate the signals to drive these boards, which is illustrated in the diagram below. The circuit is somewhat complex because the galvo drivers require a strange input. They operate on a ±15V differential analog signal, meaning that an analog voltage from -15 to 15 volts determines the angle of the mirror, and another voltage on a second pin has to be set to exactly the opposite of the first one for the driver to recognize the command as valid. (So one pin receives +10V, for example, and the other receives -10V.)
Once I could steer the laser beam, I started working on getting the Asteroids game projected. The easiest way I found to do this was modifying an existing emulator to run the original Atari game, while simultaneously sending out coordinates for the laser as each line was drawn onscreen. This game is ideally suited for this application because it was originally designed to be displayed using a vector CRT, where an electron beam is steered (much like the laser) to draw lines and shapes on a phosphor screen. So all I needed to do was make the laser follow the vector CRT commands.
The commands are sent from my laptop over the USB port to an STM32F4 microcontroller. This runs a simple script that sends the data out to two MCP4725 digital-to-analog converters (DACs). Each DAC then outputs an analog voltage from 0 to 5V for the X or Y coordinate, which then gets translated to ±15V as mentioned before.
One major obstacle with this project was getting the circuit to draw things fast enough. Between the asteroids, score, spaceship and bullets, there are a lot of things that have to be drawn over and over every frame. The biggest bottleneck ended up being getting the DACs to output the right voltages fast enough. The rest of the circuit responds very quickly to changes in voltage, and the mirrors move quite fast. However, since the DACs are controlled over an I2C bus, setting their voltage essentially requires a <start> command, followed by the data, and a <stop> command.
Originally I had both the DACs on the same bus, which meant I could only update one at a time, and sending 3 commands for each coordinate was very slow. Often, the laser would trace out only about half the things it needed to draw before the next frame arrived and it had to start drawing all over again.
To fix this I changed the hardware by putting each DAC on a separate bus, meaning both the X and Y coordinates could be sent simultaneously. Additionally, I set them to “burst mode”, meaning I was able to package the data into bursts, reducing the number of times <start> and <stop> had to be sent. So, instead of:
<start>, 1, <stop>, <start>, 2, <stop>…
The commands instead looked like
<start>, 1, 2, 3, … <stop>
With this issue solved, it was ready to rock. I took the whole setup up to the balcony outside the kitchen on the 5th floor of my dorm, and set it up to project onto the Green Building. Then I invited everyone to come play asteroids on my laptop and see their moves projected on the big concrete “screen”.
Here’s a video of it in action: